Clone the project repo to follow along…
In the first three parts of this series on shipping containerized Node apps using the Elastic Container Service, we looked at how to Dockerize our app, get it ready to ship by using the Elastic Container Registry, and explored Task Definitions.
Along the way we learned key concepts, delved into copious amounts of documentation (keep those links handy!), and used the UI and CLI to accomplish our goals. In the next article we’ll review manual tasks, converting them to Terraform for a fully automated solution (Infrastructure as Code). Before we can do that, we need to spend more time with the console to understand all of the pieces we need to succeed.
In this article we use the UI to examine the building blocks of any ECS based app – Clusters, Services and Tasks. Sticking to console a bit longer, we’ll successfully deploy our Node.js app to the cloud. By connecting these dots, we’ll have enough understanding to begin automating.
Launch Types
We’ve already referenced Fargate when defining our Task Definition. I’m not going to drill into launch types much further here, but understanding them is part of building clusters. Just remember that you have two choices – EC2 or Fargate.
If you need to manage your own container hosts, the EC2 launch type supports that. You can use Amazon Linux AMIs to minimize setup tasks (e.g. installing and keeping the Container Agent up to date), or build atop your own image for complete control. This is typically only a good option if you have specific requirements which prevent the use of shared infrastructure, or the Fargate launch type is not available in your region.
If you prefer letting your IaaS do as much heavy lifting as possible, Fargate is your friend. For our simple use case (or any time I can), we’ll be using the Fargate launch type since it’s both easier to get started and maintain in the long run.
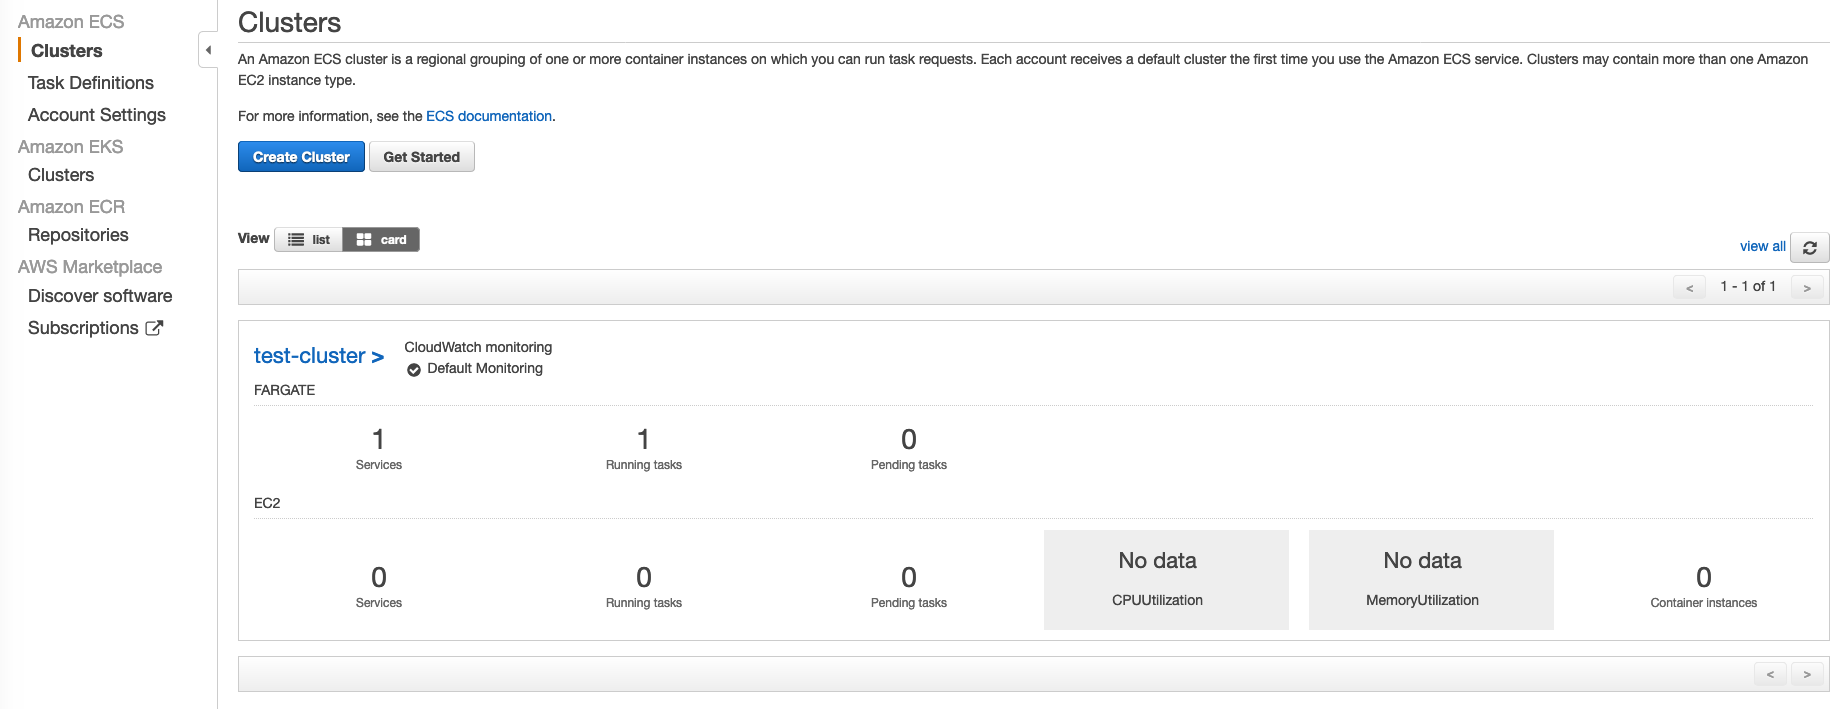
Clusters
As the highest level abstraction, clusters have relatively few moving parts. You can’t do anything useful without one, but the good news is they are easy to configure… whether in console, or later as we’ll see with Terraform.
- Login to the AWS web console as a non-root admin user
- Go to Services > Elastic Container Service > Clusters > Create Cluster
- Select Networking only (Fargate) then Next
- Enter a cluster name (e.g. test-cluster)
- Use your default VPC (easiest, you can also create a new one)
- Click Create then View Cluster
With just a few clicks and barely touching the keyboard you’ve got a cluster at your disposal. At first you will have zero services and tasks… let’s fix that!
Tasks
Clusters are a nice corral for our herd of tasks… Luckily, we already worked through the grunt work of building a task definition for our simple service. If you don’t remember, refer to the sample in our project repo . With that handy, we can load our task definition in the console:
- Go to Task Definitions > Create new task Definition > Fargate > Next step
- Ignore everything, scroll down and click Configure via JSON
- Paste task-definition.json contents into the text field
- Create
- You should see “succeeded” - click View task definition

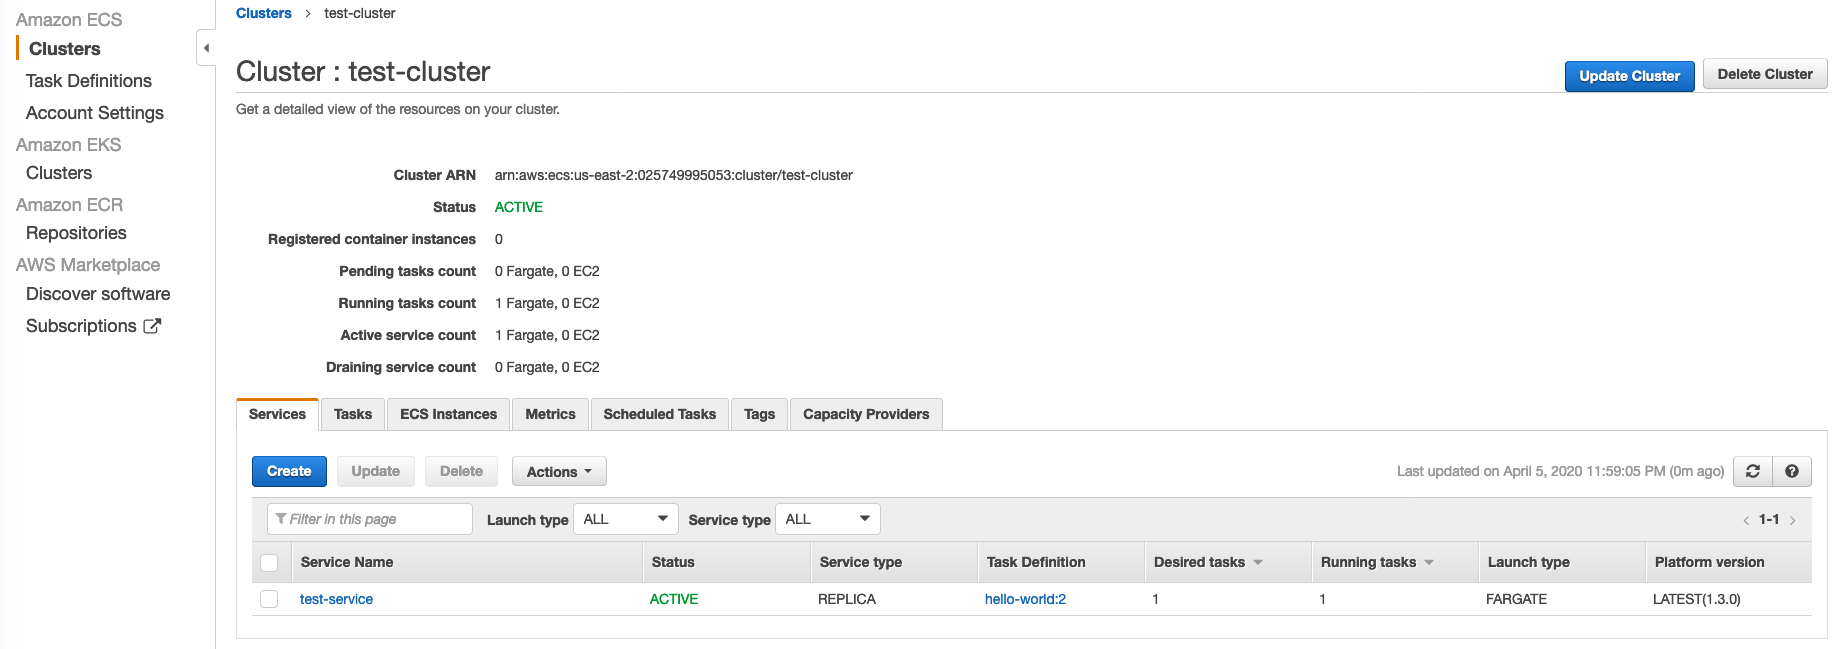
Services
Now that we have a cluster to host them and tasks to compose them, we are ready to define the real workhorse… an ECS service. Services have a lot of moving parts, from integrating with clusters, to pulling together tasks, along with network and deployment orchestration concepts.
As usual in blogs, we’re walking the simplest path – a single task, directly exposed to the world. This utilizes the major ECS components, but brushes over several things such as load balancing, DNS, TLS, volume management and integration with other services (real-world dependencies). That allows us to see key concepts without turning into an encyclopedia… but take your time when exploring the UI. Building familiarity while experimenting will make converting to Terraform easier!
Let’s get our simple service exposed to the world:
- Go to Clusters (Services tab) > select cluster name > Create
- For Launch type select FARGATE
- Select Task Definition family created above
- Select cluster name (test-cluster)
- Type a service name (test-service)
- Service type should be REPLICA
- Number of tasks: 1
- Minimum healthy percent: 100
- Maximum percent: 200 (this allows scaling up to deploy)
- Deployment type should be Rolling update
- AZ Balanced Spread (doesn’t matter when only running one task!)
- Next step
- Select Cluster VPC
- Select subnet(s) (if running multiple tasks, use multiple subnets for HA)
- Edit the auto-created security group (give meaningful name, replace 80/TCP with Custom TCP 8080)
- Save
- Leave Auto-assign public IP ENABLED
- Load balancer type can be None (simple test without ALB)
- Deselect Enable service discovery integration
- Next step
- For auto scaling, just use “Do not adjust” since we’re testing
- Next step
- Create Service
- View Service
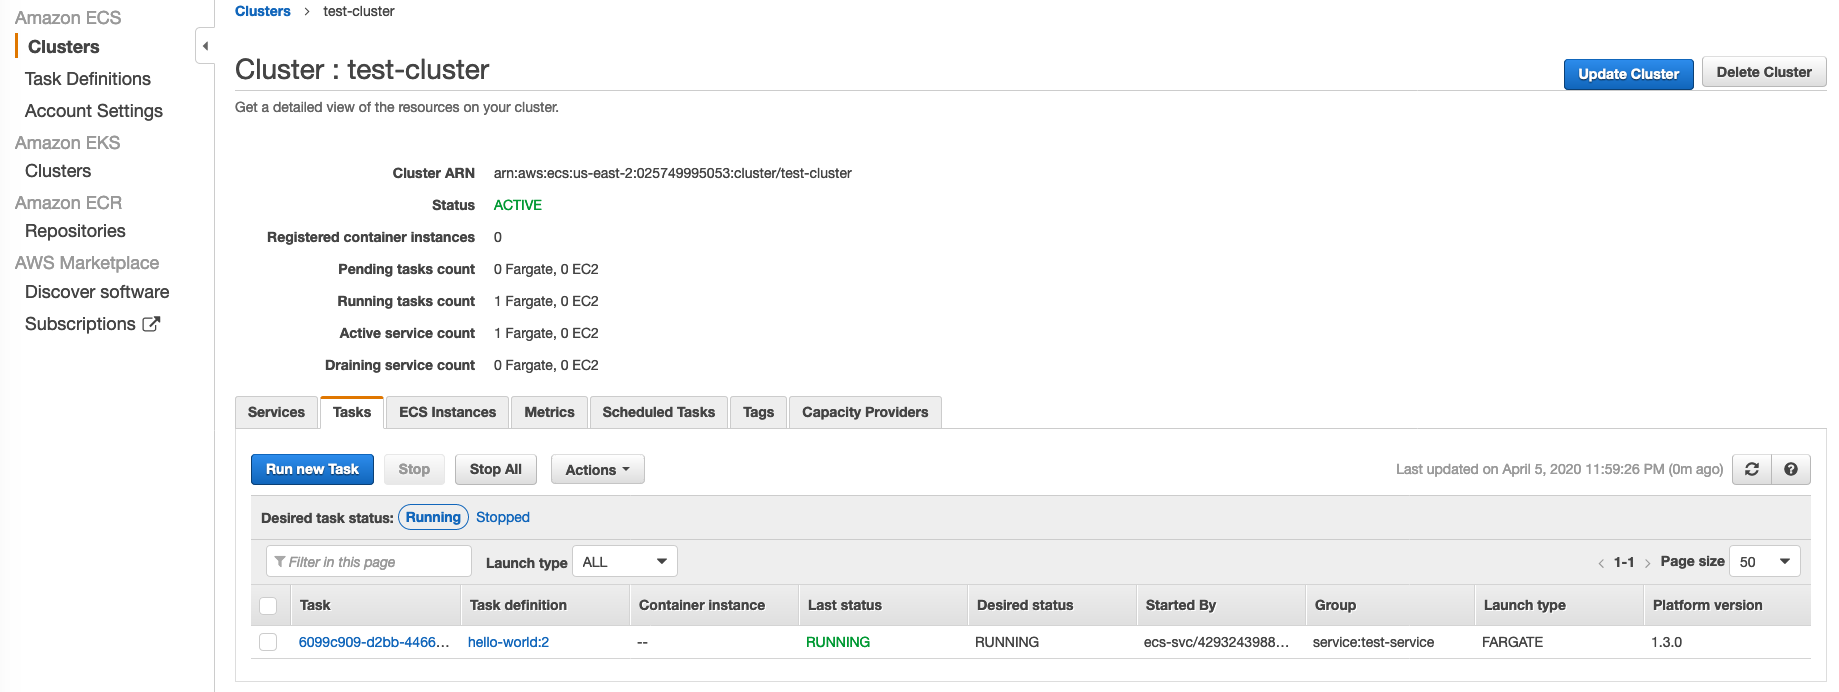
Click on the Tasks tab, then wait for the task to move from PROVISIONING to RUNNING indicating it has pulled the image from ECR and finished starting:
You can click the task GUID for more details. Beside a green ACTIVE status, we should also see HEALTHY indicating the health checks have passed. Copy the Public IP from the Network section and visit $PUBLIC_IP:8080 in a browser… you will see “Hello World” returned from our simple Node.js service!
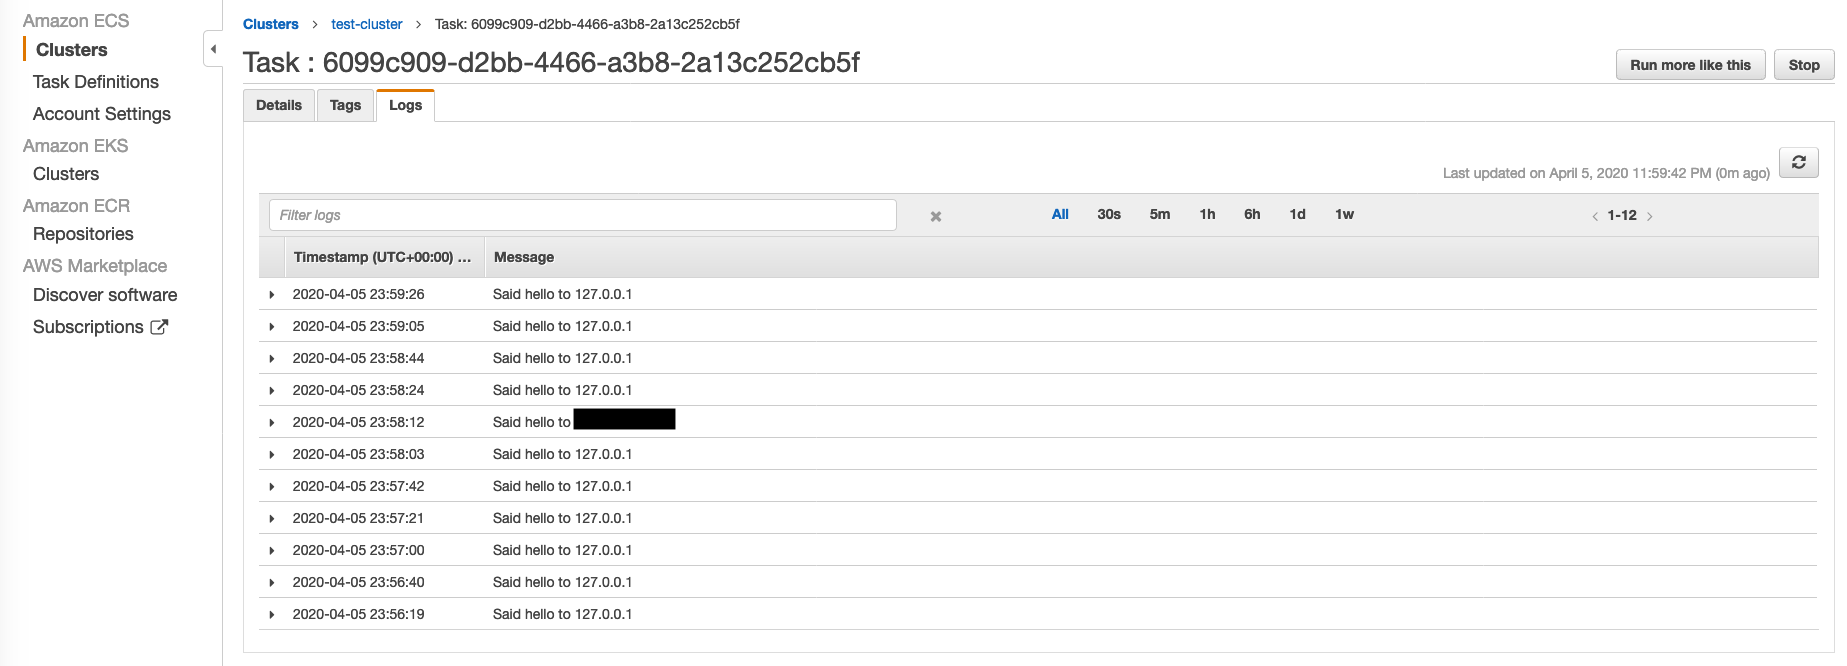
Now click the Logs tab. You should see our app’s startup message (“Listening on…”), and several web requests. Each time the root URL is visited, a “Said hello…” message is logged. You will see one from your IP, and several from 127.0.0.1. Those are the health checks running from within the container.
Updating Services
We’ve built a simple service and it’s delighting everyone that finds it through an unabashed ability to talk to strangers, but real services don’t get shipped once. There’s a lifecycle, and the real magic happens when we continuously iterate and ship furiously! Luckily, we’re managing a containerized app that makes deployment easy.
Let’s see how easy… Make a small change to server.js (give a different greeting or modify the log format slightly – something you’ll notice so you can verify your change is live), and rebuild the container image.
docker build -t hello-world .
./scripts/ecr-push-image hello-world
Note the sha256 string returned after pushing the image (we’ll use it later)… Back in the ECS console:
- Go to Clusters > select service name > Update
- Force new deployment > Next step > Next step > Next step > Update Service
- View Service > Tasks
- A new task will be provisioned, and old task torn down
- Click the new task GUID
- Verify sha256 matches what we saw when pushing
Now visit the $PUBLIC_IP:8080 and verify your change (without an ALB, the IP will change each time a task restarts). You’ve just updated your ECS app!
Final Thoughts
That’s a lot of bullets, but wasn’t difficult… With a little time in the console we have fully managed container hosting infrastructure running our Node.js app, and an easy way to make future updates. By leveraging Fargate, we can focus on our value proposition and not get bogged down managing container hosts.
Of course, it would be nice if we could automate all that clicking… It would not only make the initial setup easier, but give us peace of mind (consistency if building parallel environments, easy DR). That’s where we’ll pick up next time. You won’t want to miss the final episode in this series where we take what we’ve learned about ECS and convert everything to Terraform for a fully automated build. See you next time!